How to fix error code 10 (This device cannot start)
The error ‘The device cannot start (Code 10)’ is an error related to Device Manager issues. This is important to know, because if you receive an error with code 10 in the situation which doesn’t involve devices’ operating, then it is another error which couldn’t be fixed with the instructions of this article.
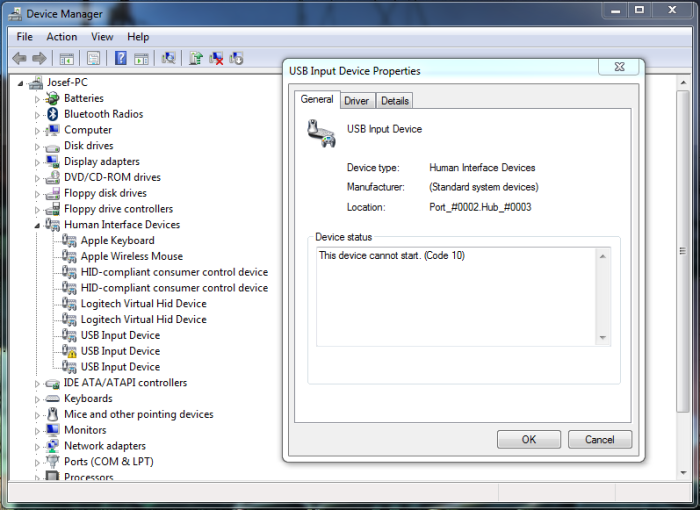
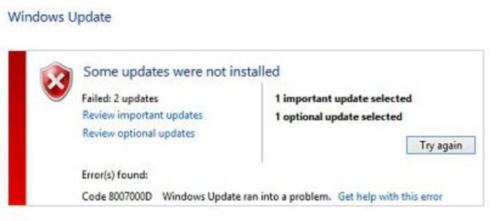
The error may be received after or when you update software, installing drivers, or try to interact with the accessible devices. Sometimes drivers add its identifier to the registry value, and when the error occurs it will have a specified message text that would help you to determine what device causes problems.
Causes of receiving error code 10 message
Error code 10 may appear due to numerous reasons. Though the error message doesn’t give much information about reasons of error grounds, it is likely one of the list:
- Device Manager fails to reach the device
- Device Manager doesn’t get response from one of the required drivers
- Device Manager cannot read the driver data
More specifically it may mean that:
- The driver version is too old and need to be updates
- The needed driver is deleted
- The driver stopped to worked properly
- There is a driver connection or configuration issue
Ways to repair error code 10:
Below we present instructions that may solve the problem. Depending on your system, the solutions may slightly differ, so perform the steps suitable for your system.
Automatic solution
Repairing system errors may be not an easy task, so we should warn you that performing some of the steps may require above-average skills, so if you don’t feel experienced enough, you may apply to automatic tool.
Total PC Care is all-in-one and must-have tool for users who want to forget about numerous system issues like error code 10. Aside from fixing error code 10, Total PC Care will also automatically resolve other issues boosting your computer speed and stabilizing its performance.
Steps of manual resolving
Solution 1. Update the drivers
- Initiate the search for ‘control panel’
- Change the view type to Small icons
- Go to Administrative Tools
- Open Computer Management
- On the left pane choose Device Manager
- Look for the devices with an exclamation point sign
- Right-click them and choose Update Driver Software…
Solution 2. Reinstall the drivers
- Repeat the steps 1-6 from the previous Solution
- Right-click the driver and choose Uninstall
- Click on the Action menu and choose the Scan for hardware changes option
Solution 3. Fix the registry entries
- Press Win+R
- You will see the Run command window. Type in its search bar ‘regedit’ and hit Enter
- Go to HKEY_LOCAL_MACHINE\SYSTEM\CurrentControlSet\Control\Class\
- Here you will see lines of 32 digits. Each combination refers to a certain type of hardware. Choose the line according to the class of hardware that causes troubles from the information below:
CDROM 4D36E965-E325-11CE-BFC1-08002BE10318
DiskDrive 4D36E967-E325-11CE-BFC1-08002BE10318
Display 4D36E968-E325-11CE-BFC1-08002BE10318
FDC 4D36E969-E325-11CE-BFC1-08002BE10318
FloppyDisk 4D36E980-E325-11CE-BFC1-08002BE10318
HDC 4D36E96A-E325-11CE-BFC1-08002BE10318
HIDClass 745A17A0-74D3-11D0-B6FE-00A0C90F57DA
Image 6BDD1FC6-810F-11D0-BEC7-08002BE2092F
Keyboard 4D36E96B-E325-11CE-BFC1-08002BE10318
Modem 4D36E96D-E325-11CE-BFC1-08002BE10318
Mouse 4D36E96F-E325-11CE-BFC1-08002BE10318
Media 4D36E96C-E325-11CE-BFC1-08002BE10318
Net 4D36E972-E325-11CE-BFC1-08002BE10318
Ports 4D36E978-E325-11CE-BFC1-08002BE10318
System 4D36E97D-E325-11CE-BFC1-08002BE10318
USB 36FC9E60-C465-11CF-8056-444553540000
- Click the required line and select UpperFilters on the right pane
- Click the Edit menu. then Delete
- Now choose LowerFilter on the left pane
- Click the Edit menu. then Delete