How to fix SS3svc32.exe issue
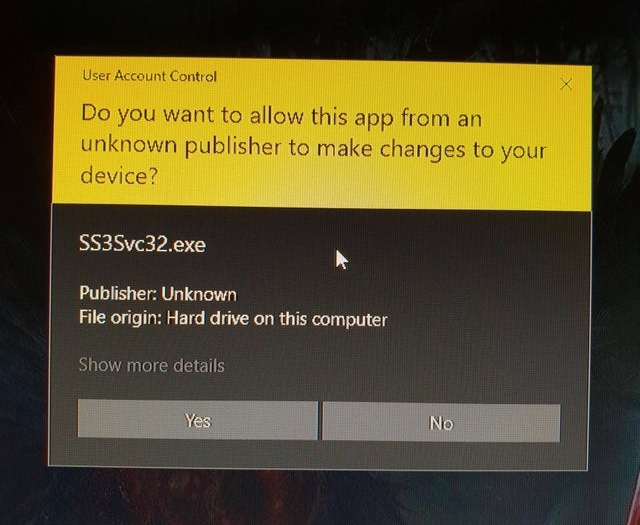
After the latest Windows update, many users faced the problem related to SS3svc32.exe file. The User Account Control (UAC) started popping up on startup asking to allow SS3svc32.exe to make changes. It should be noted that this issue concerns only the owners of computers with the Asus motherboard. The fact is that SS3svc32.exe file (Sonic Studio 3) is a component of Realtek HD audio drivers suite, which is used in many ASUS mainboards and which after the update began to conflict with the system. Now, we all know that SS3svc32.exe is not malware and we don’t need to worry about computer security. Still, to stop SS3svc32.exe pop-up to appear each time you start the computer, you may follow this guide.
Automatic solution
Repairing system errors maybe not an easy task, so we should warn you that performing some of the steps may require above-average skills, so if you don’t feel experienced enough, you may apply to the automatic tool.
The Advanced System Repair is an all-in-one tool for users who want to forget about numerous system issues like SS3svc32.exe issue on Windows 10. All you need to is to launch it, the program itself will find and fix all detected problems automatically.
Or you may use manual methods:
Solution 1
The easiest way to get rid of SS3svc32.exe pop-up is to allow the app to “run as administrator”. To do this:
- Locate the file SS3svc32.exe in explorer (it is usually located at c:\Program Files\ASUSTeKcomputer.Inc\Sonic Suite 3\Foundation\
- Right click the file and select Properties
- Go to the Compatibility tab and click the shield Change settings for all users button
- In the opened window, and enable the check box Run this program as an administrator
- Click Apply, then click OK
In most cases, this should solve the problem. If not, proceed to the next step.
Solution 2: Fix SS3svc32.exe pop-up via Task Scheduler
This method is much more complicated, therefore it is suitable only for experienced users.
- Open the Start Menu, then type: taskschd.msc in the search box and press Enter (If prompted by UAC, click on Yes)
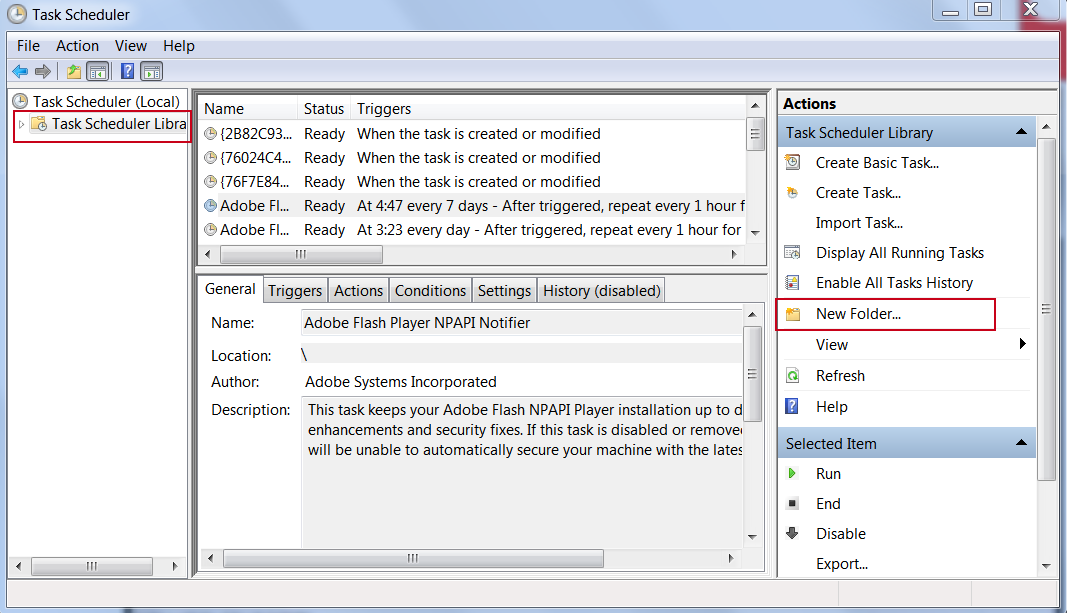
- In the left pane of Task Scheduler, click on the Task Scheduler Library folder, then click on New Folder in the far right pane.
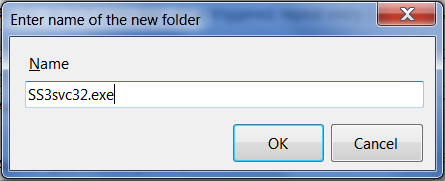
- Type in a name (ex: program name “SS3svc32.exe”) you want for the new task folder to make finding the task easier, then click on OK
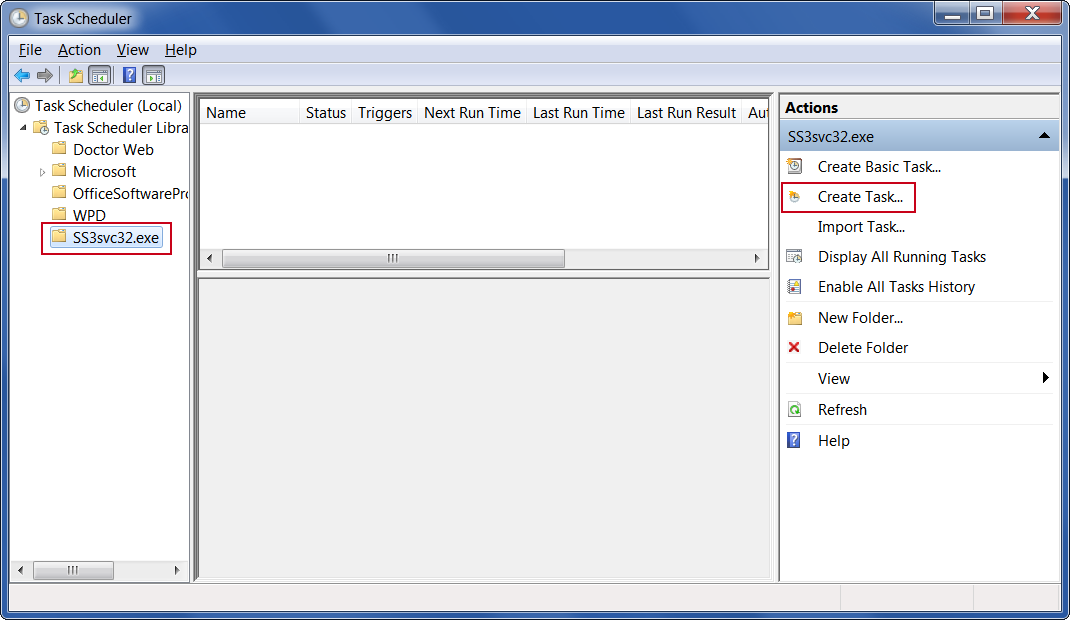
- In the left pane of Task Scheduler, click on the new task folder (ex: SS3svc32.exe), and click on Create Task in the far right pane
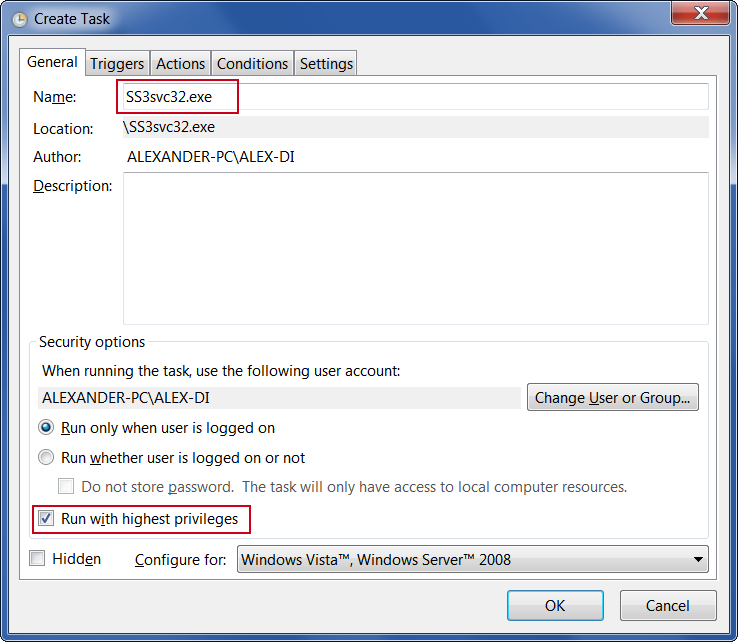
- Under the General tab, type in a name for the task (ex: Program Name “SS3svc32.exe”). Make sure Run with highest Privileges option is enabled.
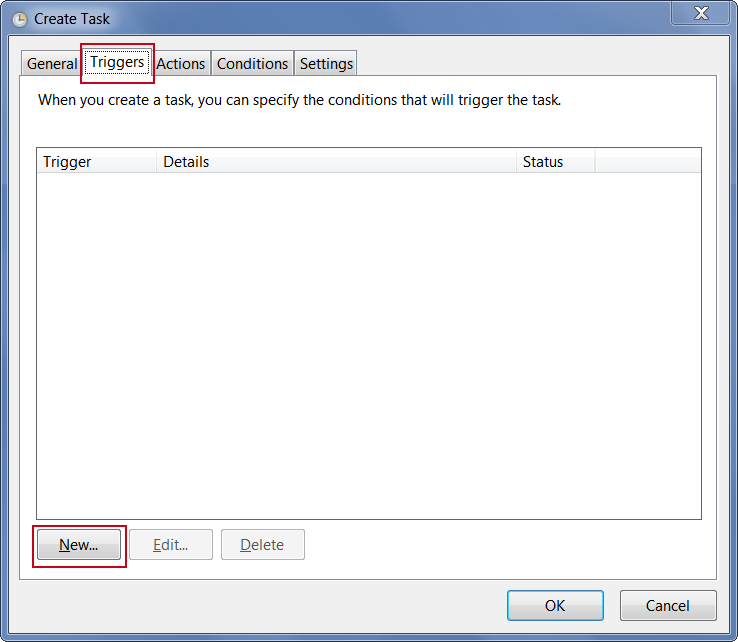
- Go to the Triggers tab and click New button.
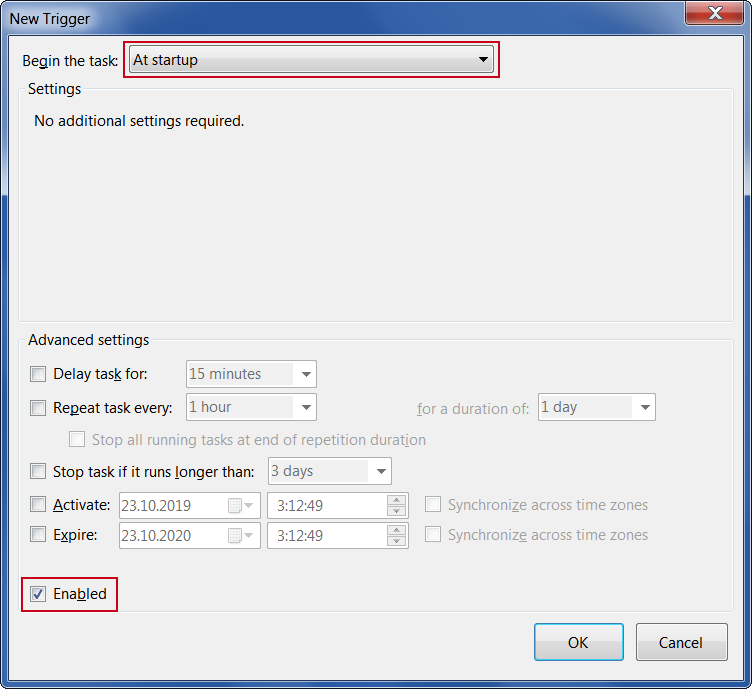
- In the Begin the task drop down menu list, select At startup. Next, make sure that Enabled is checked, and click on OK.
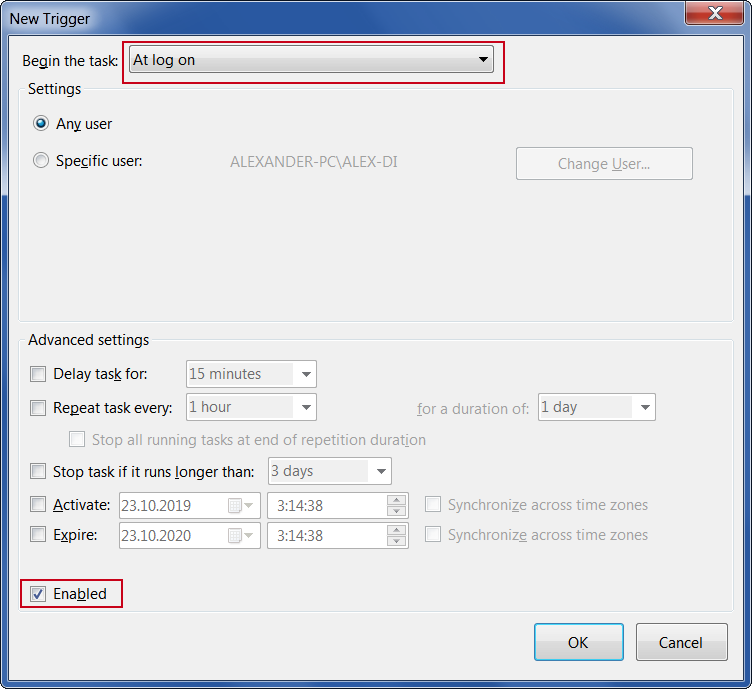
- Under the Triggers tab, click on the New button.
- In the Begin the task drop down menu list, select At log on. Next, make sure that Enabled is checked, and click on OK.
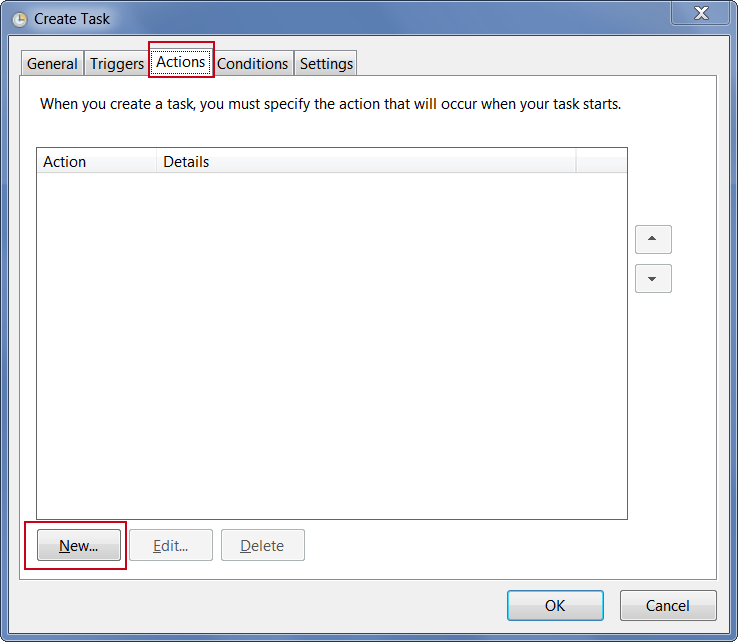
- Go to the Actions tab and click New button.
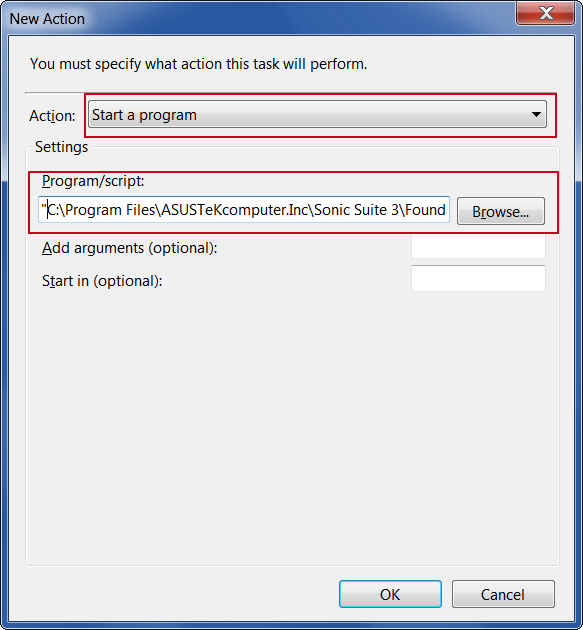
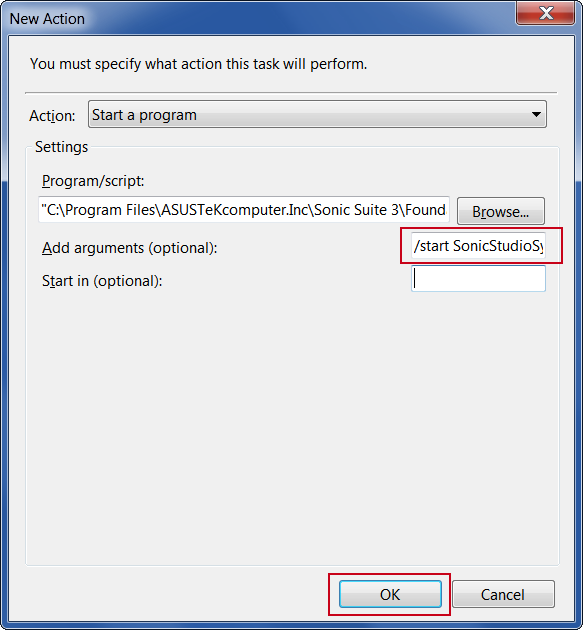
- In the Action drop down menu list, select Start a program, then click on the Browse button and select the program’s EXE file.


We recall once again this method is only for advanced users so if you don’t feel experienced enough, you may apply to the automatic tool.
We have provided two ways to solve this problem, but there is a third way and it’s actually the easiest. We figured out that this issue is caused by Windows 10 itself so we just can wait until Microsoft fixes this bug and release a new update.


i’ve tried the 1st method. yes, no pop up anymore when you start the windows, therefore, the sonic studio won’t launch at all. you basically need to manually open the app