How to fix Driver PNP Watchdog error
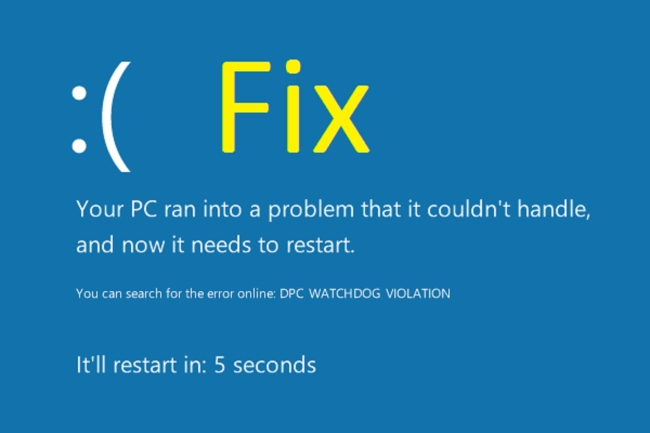
Driver PNP Watchdog error is a system issue that often appears while installing Windows 10 version 1803 Update. This happens when the user tries upgrading Windows 10, the update starts and then freezes at some stage and eventually showing the “Blue Screen of Death” (BSOD) with the Driver PNP Watchdog error. There are many reasons for the appearance of this error. It may be caused due to the system problems, the presence of viruses and other malware, out of date drivers or damaged hard drives of your PC and so on. As a result, the user can’t install important updates without facing Driver PNP Watchdog error. Below in this guide, you will find several methods to fix Driver PNP Watchdog error.

Ways to fix Driver PNP Watchdog error :
Automatic solution
Repairing system errors may be not an easy task, so we should warn you that performing some of the steps may require above-average skills, so if you don’t feel experienced enough, you may apply to an automatic tool.

All operations are carried out in Safe Mode with networking. To load your system in this mode, perform the following steps:
For Windows XP/Vista/7
- Reboot you PC;
- Press F8 button when you turn on the computer;
- Advanced Boot Options menu should appear;
- Select Safe Mode with Networking;
For Windows 10
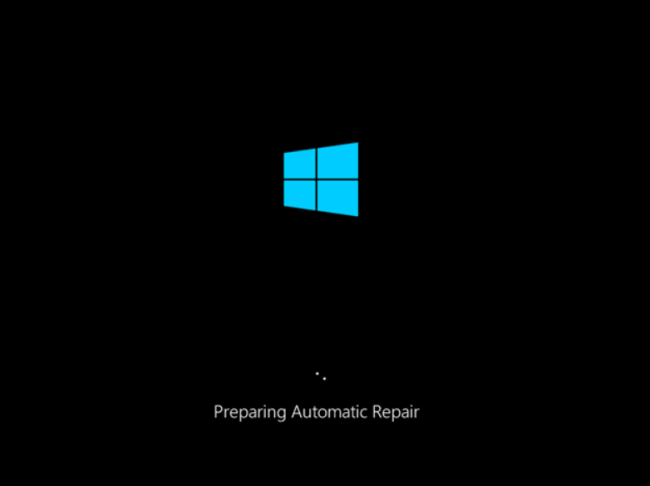
Since Windows 10 fails to load, and we can’t access System Configuration, let’s try using this simple method. The thing – Windows 10 turns on “Automatic Repair mode” (in this mode we can boot into Safe Mode) when it fails to boot 3 times in a row. To cause “Automatic Repair mode” we need to press “Reset” button when you see the Windows logo.

If you’ve done it right, you will see a screen that your system is “Preparing Automatic Repair”
- Once “Automatic Repair” is loaded, press the “Advanced options” button.;
- Select “Troubleshoot” on the next screen.;
- Go to Troubleshoot -> Advanced options -> Startup Settings and press Restart;
- After Windows 10 restarts, you should press F5 key to Enable Safe Mode with Networking.
Once loaded, you need to download and launch it. Open and run a scan for Windows errors and Registry issues. The program itself will detect and fix all system errors preventing the operating system from booting.
Steps of manual resolving
Solution 1. Remove problem causing registry entries
- Press Windows+R
- Input ‘regedit’ and hit the Enter key
- Go to the following location HKEY_LOCAL_MACHINE\COMPONENTS\
- Remove the below listed entries
- AdvancedInstallersNeedResolving
- PendingXMLIdentifier
- NextQueueEntryIndex
- Reboot the PC
Solution 2. Re-register the required components
- Initiate the search for ‘command prompt’ as administrator
- Type the following commands and hit Enter after each
SC config wuauserv start= auto

SC config bits start= auto

SC config cryptsvc start= auto

SC config trustedinstaller start= auto - Exit
- Reboot the PC

If you are not sure what type of system you are using, then simply right-click the My Computer or This PC icon and choose Properties – in the appeared window you will see the information on your system version.
Solution 3. Permit VSS Copy
- Go to the Control Panel
- Change the view type to Icons
- Choose Administrative tools and within it go to the Services tab
- There at the bottom of the window find the Volume Shadow Copy service and double-click it
- Click on the Startup type menu and select Automatic
- Confirm your choice by clicking OK
Solution 4. Delete Conflicting File
Use this method if the error message emerges when you’re performing an installation of software through InstallShield.
- Navigate to C:\Program Files\Common Files\InstallSheild\Professional\Runtime\ISProbe.tlb
- And remove ISProbe.tlb file

It is likely that you will need to view hidden files & folders to detect the file. For this open the Control Panel and click Folder Options. In the emerged window go to the tab View and mark the option ‘Show hidden files, folders, and drivers’
For windows 10, where is the reset button?
Reply
“reset” button is a universal button which doesn’t depend on your operating system. This button is located on the system unit of the PC if you have a notebook – just reboot it by pressing |”shutdown” button for a while.
Reply
I can’t even get to the screen with the Reset or Advance Options Mode
Reply
Just turn off your PC when you see the Windows logo every time until you see the “Preparing Automatic Repair” title
Reply
i could not perform windows update because of blue screen occuring during update (pnp watchdog issue). the pc was repeatedly trying to update then rollbacking to previous version.
in my case, i performed a clean of registry using ccleaner and it just let the next update be done successfully. in case this hint help anyone…
Reply
Hey i have a driver pnp watchdog error and my laptop does not go past the asus logo at all
When it states that preparing automatic repair it loads for a minute the BSOD with the error
Any help?
Reply
That PC repair tool is NOT free…
Reply
Yeah, it’s not free, so if you don’t pay, you may use manual guide
Reply
That PC repair tool is NOT free…
Reply
None of this worked for me.
Trying to update to Win 10 from Win 7 and it gets about two hours into the install and crashes with this error. Very frustrating.
I also couldn’t find the “COMPONENTS” in the registry either.
Not sure how to proceed at this point.
Reply
If HKEY_LOCAL_MACHINE\COMPONENTS is not visible you can load it using the following steps:
1\ Open Regedit
2\ Select HKEY_LOCAL_MACHINE
3\ Click ‘File’ and ‘Load hive…’
4\ Browse to “C:\Windows\System32\config”, select ‘components’ (file type=file) and click ‘Open’
5\ Enter “COMPONENTS” as the key name and click ‘ok’
Reply