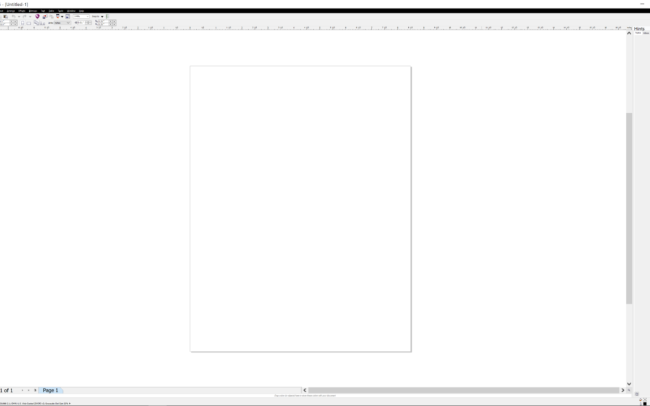
High pixel density displays provide a clearer picture, allowing you to display the smallest details on the screen, so you can view and edit photos and many other high-resolution materials. Thanks to the excellent image clarity and improved color reproduction, you can create real masterpieces. Nevertheless, many applications can’t correctly display the picture, making it either too small or blurry. This problem is especially acute for users of graphics programs such as Photoshop and CorelDraw. Today we will talk about the second, and more precisely about its 6 versions and the previous ones. It is worth noting that the latest versions fully support such a display, so we can bypass them. As we already said, in older versions up to 6, the interface and menus are displayed very small becoming unreadable. And even the standard zoom with windows system settings does not solve this problem. In this article, we will offer you several successfully implemented methods, which I hope will help you solve the problem with mapping in Coreldraw
Ways to fix CorelDraw scaling problem:
Solution 1. Scaling adjustment via Windows Settings
For Windows 10:
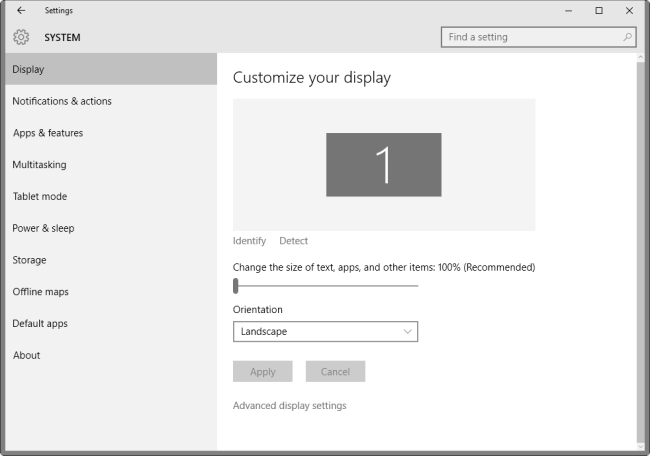
- Right-click on the desktop and select Display Settings from the context menu.
- The Settings application displays the current scaling of text, apps and other items on the screen that opens.
- You may use the slider to change the scaling value. Please note that the recommended value takes display size into consideration automatically. The value is usually set to 100% on Full HD displays and displays with lower resolutions, and to a larger value, say 200% on high DPI displays.
For Windows 7:
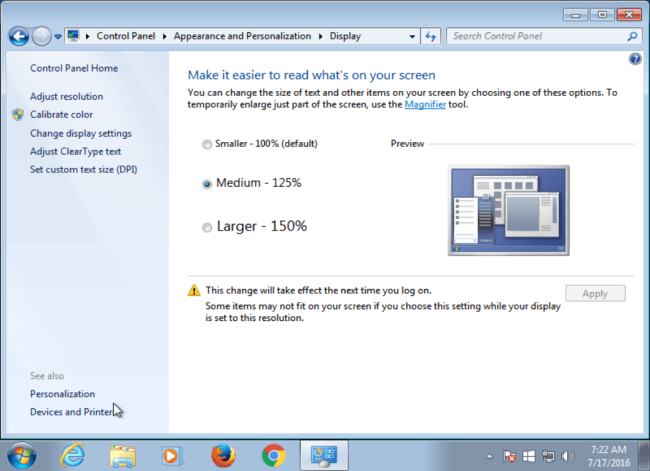
- Right-click on the desktop and select Screen Resolution from the context menu.
- Select “Make text and other items larger or smaller” when the Control Panel window opens.
- Use the options to switch to another text scaling value. The operating system highlights the default value on the screen.
- Hit the apply button once you have made the adjustment, and use the prompt to log off and on again.
Solution 2. Fixing specific programs that are not displayed correctly
For those programs that don’t support High-DPI desktops, we suggest the following way:
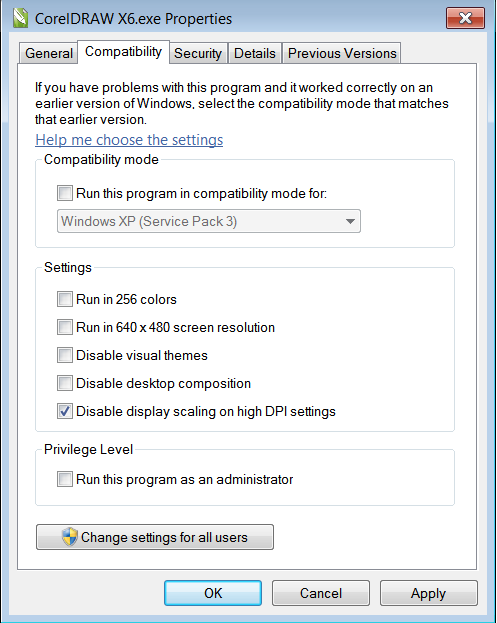
- Right-click on the program’s icon, for instance on the desktop, and select Properties from the context menu. If the program is displayed on the taskbar, right-click on it, and then right-click again on its name that opens in the menu.
- Switch to the Compatibility tab. It lists settings to improve an application’s compatibility when running. Locate “disable display scaling on high DPI settings”, and check the box.
- You find other options on the page that you may want to experiment with, for instance, to run it in a lower resolution, or disabling desktop composition.
It is also worth noting that, in some cases, this may only worsen the situation. For example, text and interface might become very small. If you faced this problem, you should get this setting back and go to the next step.
Solution 3. Use manifest files.
The most effective method that we can prepare you is to use manifest files. The manifest file is a file containing metadata for the specific program, simply put, with using a manifest file, we can directly tell Windows or make Windows think how the program works, which parameters it supports including program’s DPI awareness. To do this, you need to perform the following 2 steps:
Step 1: Enable Manifest file support
- Press Windows Button + R at the same time, type “regedit”, and then click OK.
- Go to the following registry subkey:
HKEY_LOCAL_MACHINE > SOFTWARE > Microsoft > Windows > CurrentVersion > SideBySide - Right-click, choose NEW > DWORD (32 bit) Value
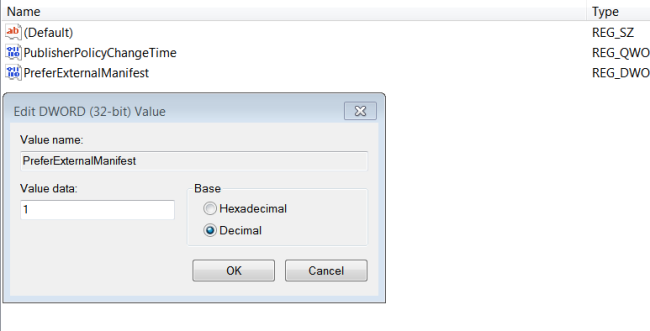
- Type: “PreferExternalManifest”, and then press ENTER.
- Right-click PreferExternalManifest, and then click Modify.
- In box “Value Data” enter “1” and select Decimal.
- Click OK. Exit Registry Editor.
Step 2: Create and place the external manifest files
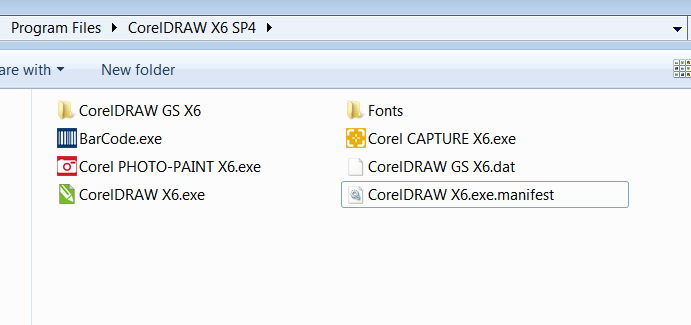
The final step is to copy your manifest file to all of the application folders that you would like to change the scaling on. CorelDRAW is located at C:\Program Files\CorelDRAW X6 SP4 so you should put the manifest file in the root folder of the program. Then you need to rename this file as executable one adding “.manifest” extension. In our case, it’s “CorelDRAW X6.manifest”.
I was able to resolve my issue in Windows 10 by opening properties as shown, then setting the Compatibility > Override High-DPI scaling behavior > System (Enhanced)
Reply
That works 🙂
Reply